
 VCP Documentation
Appearance
Calendars
Planning Events and scheduling dates.
Adding an Event to the Calendar

To add an Event to the Calendar, click the ‘+ Add Event’ button above the left side of the Calendar. A panel will open on the right side of the screen where the Calendar Event can be edited with a 'Title' and 'Notes' as well as the 'Time Zone' and 'Date'.
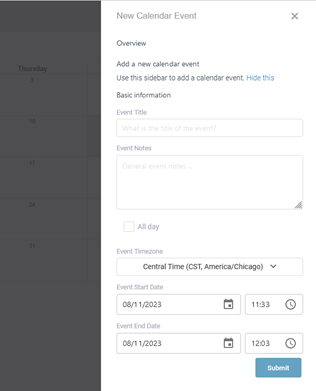
Click the blue ‘Submit’ button in the bottom right corner to persist the desired changes. When done, a new Event will be added to the Calendar in the middle of the screen.
Calendar Events can be edited by clicking on the event. A pop-up will appear in the same fashion as Event creation to allow for any changes needed.
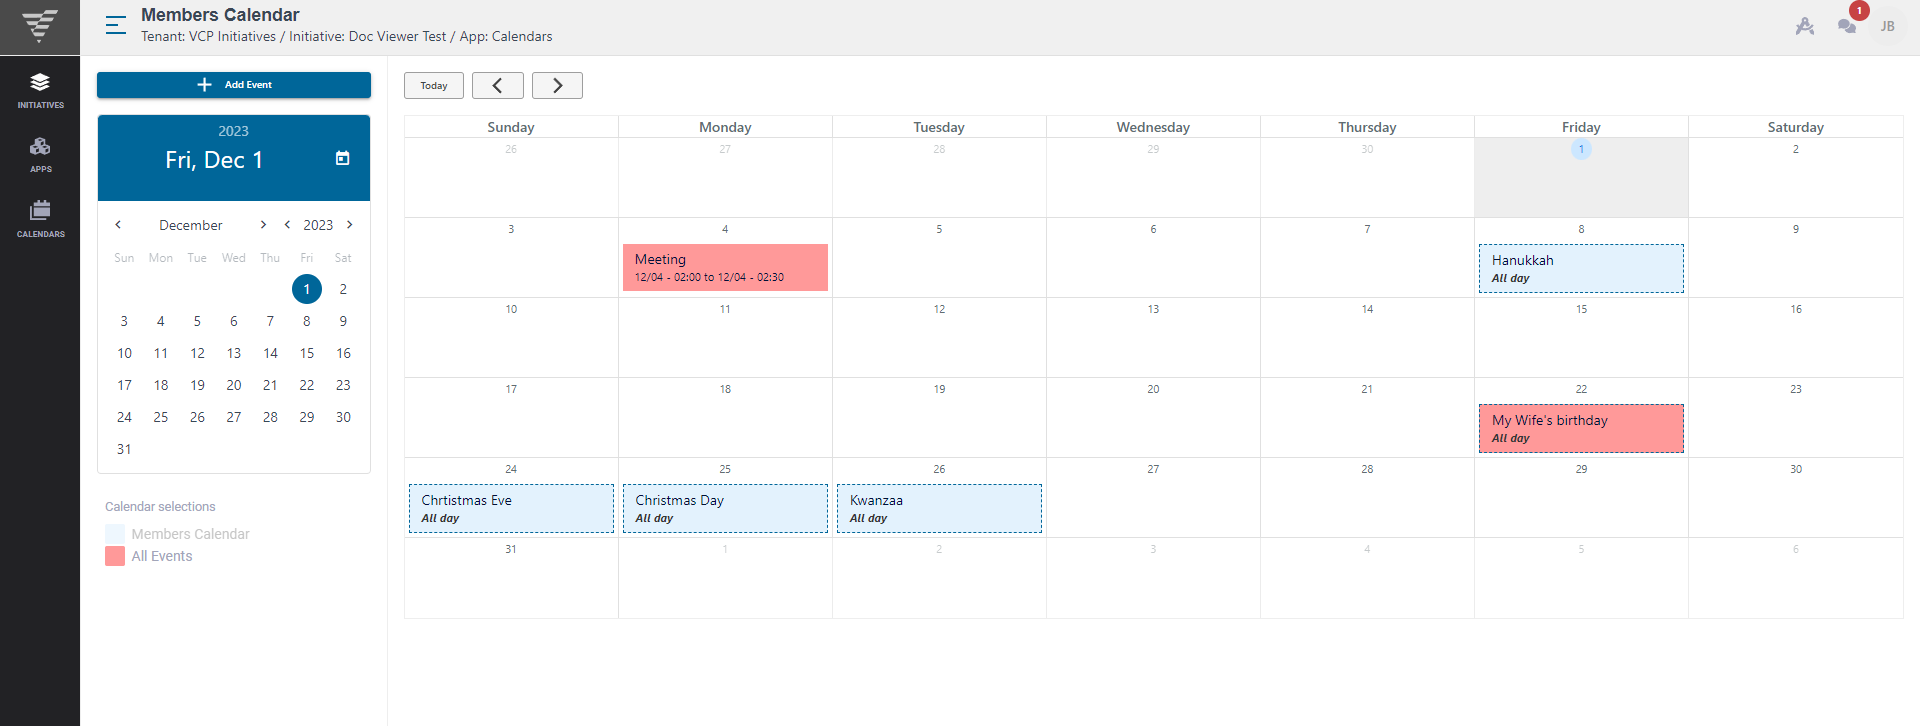
Additional color highlighting can be set to your Event by clicking the Calendars icon on the black left side ribbon and clicking on the pencil icon. When the panel pops out from the right side of the screen, (if given the ability to do so), navigate over to the 'Advanced' tab and use the eyedropper to the right to select a color or input your desired hex number. Make sure to toggle the box next to the other Calendars you wish to see Events from and then press the blue 'Submit' button to confirm your changes when finished.
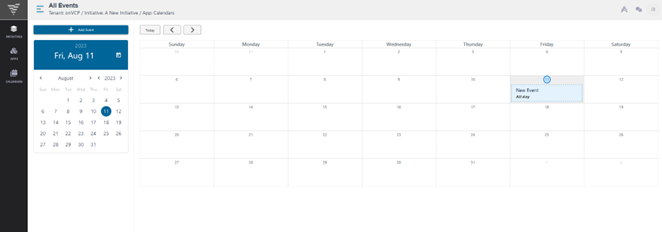
Navigating back to your Calendar, you will now see your Events on your Calendar highlighted with the color you selected. As a member of multiple Calendar events, you can see all your color-coded Events at a glance by styling them in this way.
Adding a New Calendar App
To add a new Calendar App, add the app to the current Initiative. This can be achieved by clicking 'Apps' on the black left side ribbon and clicking the plus button.
Creating Additional Calendars
Additional Calendars can be created by clicking the ‘Calendar’ icon on the black ribbon on the left side of the screen. This will initiate a panel to pop out from the left side of the screen to allow additional Calendars to be added to your projects. Upon clicking this, a panel will slide out from the right side asking for some preliminary information – The Calendar Set (a category that this new Calendar should be logged under. See Creating Calendar Sets for more information), the new Calendar's name and the slug (the website link). When the changes are satisfactory, press the ‘Submit’ button in the bottom right-hand corner to persist the changes.
When you have multiple Calendars created, you can navigate between them by clicking a different Calendar listed in the sidebar.
Creating Calendar Sets
Calendar Sets are groups of Calendars that can be created to maintain chronological documents.
To get to this menu, first, you must select the Calendar App from the black left-hand sidebar. If a ‘Calendar’ app is not created, you will have to create one (See ‘Adding a New Calendar’).
Click the ‘Calendars’ app icon once again to be brought to the ‘Current Calendar Set’ menu.
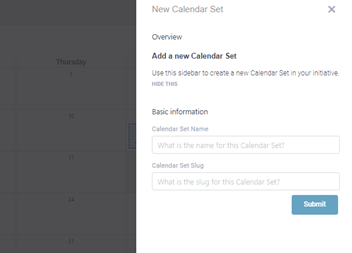
In the ‘New Calendar’ right side panel, under ‘Calendar Set’, press the plus button to create a new Calendar Set. A new panel will appear on top of the previous right-side panel. Here information can be designated for the Name and slug of the new Calendar Set. When finished, press the ‘Submit’ button in the bottom right-hand corner to persist these changes.
Editing A Calendar
Calendars have many different settings that can be edited. To commence customizing your Calendar, click the ‘Calendars’ app in the black left-side panel to open the pop-out panel.
Next, click the pencil icon to the right of the project you are working on. In doing so, a panel on the right should pop out.
In this right-side panel, there are many options throughout the various tabs to customize the Calendar.
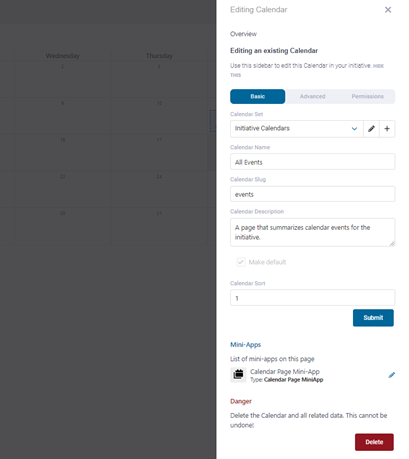
In this menu, there are three tabs – Basic, Advanced and Permissions.
In the Basic tab, there is an array of options to customize. First there is a drop-down to designate the Calendar Set (See ‘Creating Calendar Sets’ for more information about this portion). Following this section are several fields that can change or help define your Calendar including the Calendar Name (The title for your Calendar), Calendar Slug (this will be automatically generated for you, but feel free to change it to suit your project), and Calendar Description (a bit of information about the Calendar).
Below these things, there is a checkbox to make this the Default Calendar. (This box will be grayed out if there is only one Calendar in your project.)
Below this option is a field called ‘Calendar Sort’. The number in this field determines the Calendar’s placement among your other Calendars with the lower number being given more priority.
To persist the changes made to this side panel form, press the ‘Submit’ button.
Below this is a section that talks about the Calendar Mini-App. If you click the pencil tool to the right, it will allow you to Edit the Mini-App.
DANGER
Finally at the bottom is a section that will Delete the Calendar. This selection cannot be undone, so please ensure your intention to delete the Calendar is true before proceeding.
Under the Advanced tab, other changes can be made to the Calendar such as showing events across Calendars or changing the Calendar's color:
TIP
• To change a Calendar's color, either enter a hex number or use the eye dropper to the right and select a desired color.
Editing an Event
To edit a preexisting event, simply click on the Event in the main Calendar to open the right-side panel where the Event can be edited.
Navigating the Calendar
To navigate the Calendar, click on any given day in the main calendar or select a date from the left-hand side of the calendar to move within a given month.
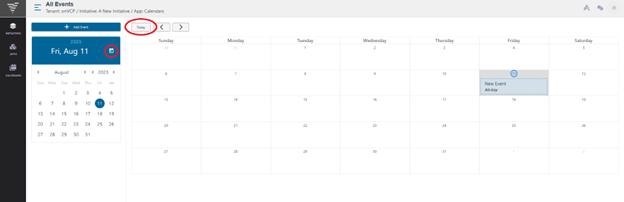
Returning to Today
Two “today” buttons can be pressed to be brought back to the current day (see photo below).
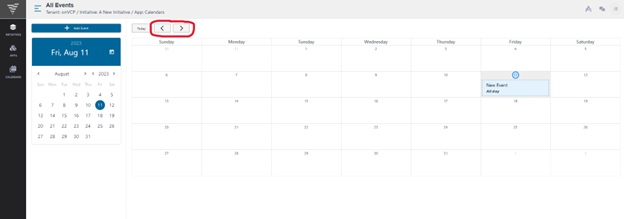
Selecting a Month
Two arrow buttons, one facing left and one facing right, can be pressed to navigate to the current and previous months.
A month can also be changed by pressing the arrows on either side of the month in the left-hand panel.

Selecting a Year
There are two different ways a year can be altered. The year can be changed by clicking on the faded year in the left-side panel allowing the days to be replaced by years and allowing the selected year to be picked.
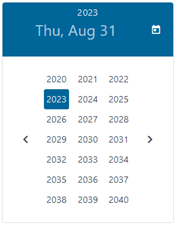
The year can also be changed by pressing the arrows on either side of the year in the left-hand panel.
