 VCP Documentation
Appearance
Virtual SimCell
A simulation tool for your executable exercises.
What is a Virtual SimCell?
The Virtual Simulation Cell ("Virtual SimCell", or simply "VSC") is a virtual exercise simulation and management application.
Creating a Virtual SimCell
To create a Virtual SimCell, first click the 'Apps' icon in the black ribbon on the leftmost side of the screen.

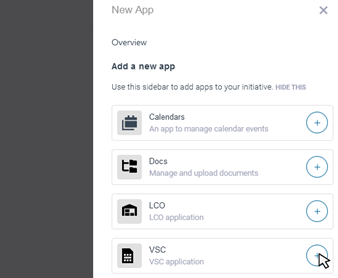
Under the Apps tab, click the plus button to add a new App.

When the right-side panel opens, select the plus icon next to VSC to generate a Virtual SimCell application.
A spinning symbol will show in the circle where there was a plus sign. When the Virtual SimCell is generated, a checkmark will appear. Close the right-side panel and then navigate again to the far-left side tab.
Upon navigating to the black left side tab once more, there will now be a ‘VSC’ app listed under ‘Other Apps’. Click on the VSC to launch the Virtual SimCell app.
Once created, The Virtual SimCell will show a blank app. This app can be input with your information to fit your needs.
Anatomy of the Virtual SimCell
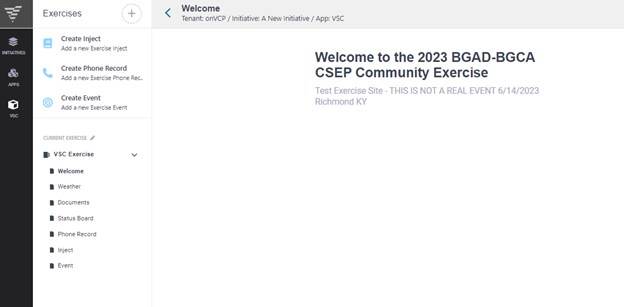
The Virtual SimCell has various components that make it unique compared to other Apps.
The Welcome page is a landing page that can be edited by an Administrator. This page displays information about the name of the exercise, the date, and the location in which the exercise takes place.
The Weather page is a page that will display either real-time or generative weather for your exercise.
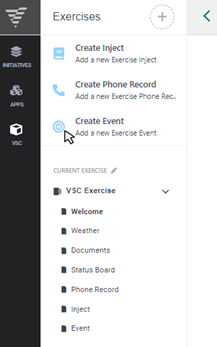
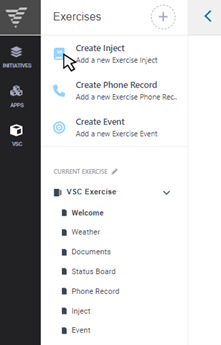
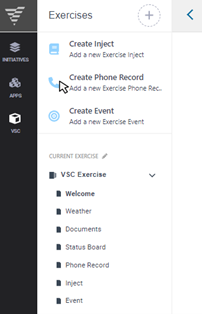
Within the VSC, various activity forms can be made, rendered, and managed. These forms are the Injects, Phone Records, and Events (see red sections in the picture below). These forms can be created by clicking on the corresponding button in the left section of the page.
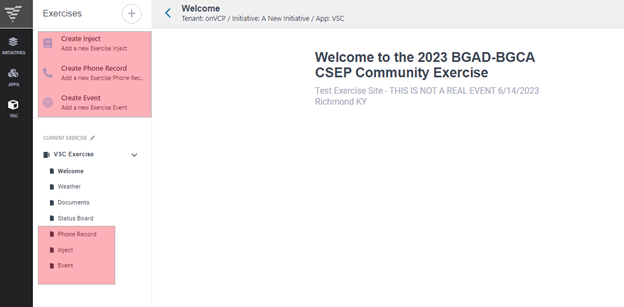
Upon clicking, a panel will appear to the right where information can be entered to generate the basic corresponding form. The forms have their sections, where they can be managed at the bottom left portion of the page.
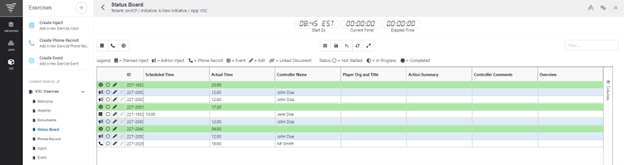
Once these forms are created, they can be managed and maintained within the Status Board (See the Status Board section for more information).

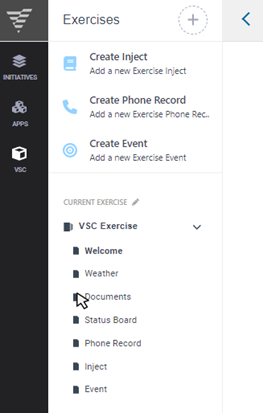
The Virtual SimCell can also view documents. These files are accessible by clicking on the ‘Documents’ link on the left side of the screen. A singular root folder (named 'Default Exercise') can be expanded to show all the folders and documents that are accessible to the Virtual SimCell.

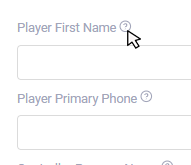
TIP
If at any point you may be unsure about where something is or what it does, click on the question mark slightly to the right of a field or object. A panel will appear to the right with more information about that item.
Creating Events
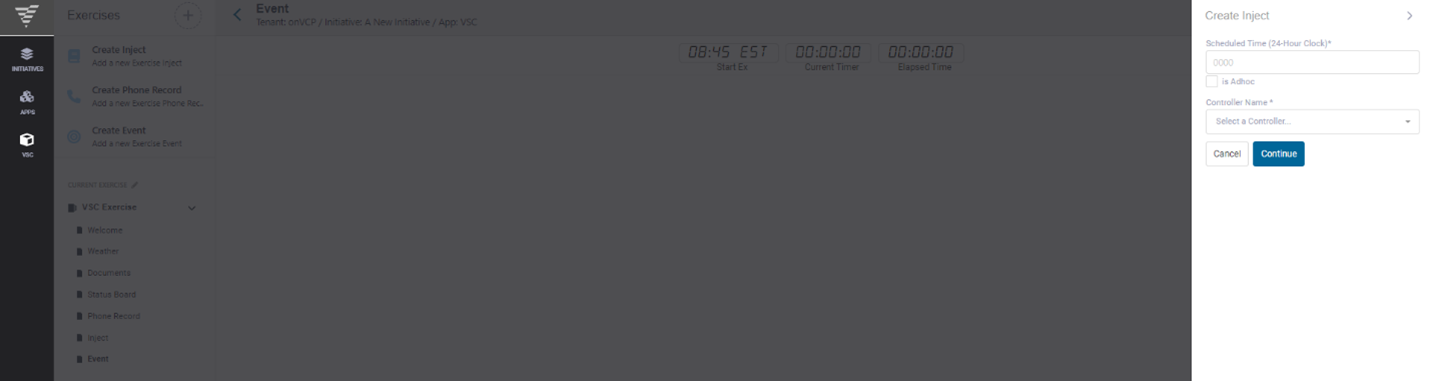
Events are forms that log exercises. Examples of this type of exercise consist of emergency situations, such as; a tornado touching down, sirens going off, etc. To begin, click on the ‘Create Event’ link on the left side of the page.
Once clicked, a panel on the right side of the page will appear accepting the Event's time. Events are unlike other forms as they need only the time to initially generate the form. Once the time is entered, click the ‘Continue’ button below to generate the form.
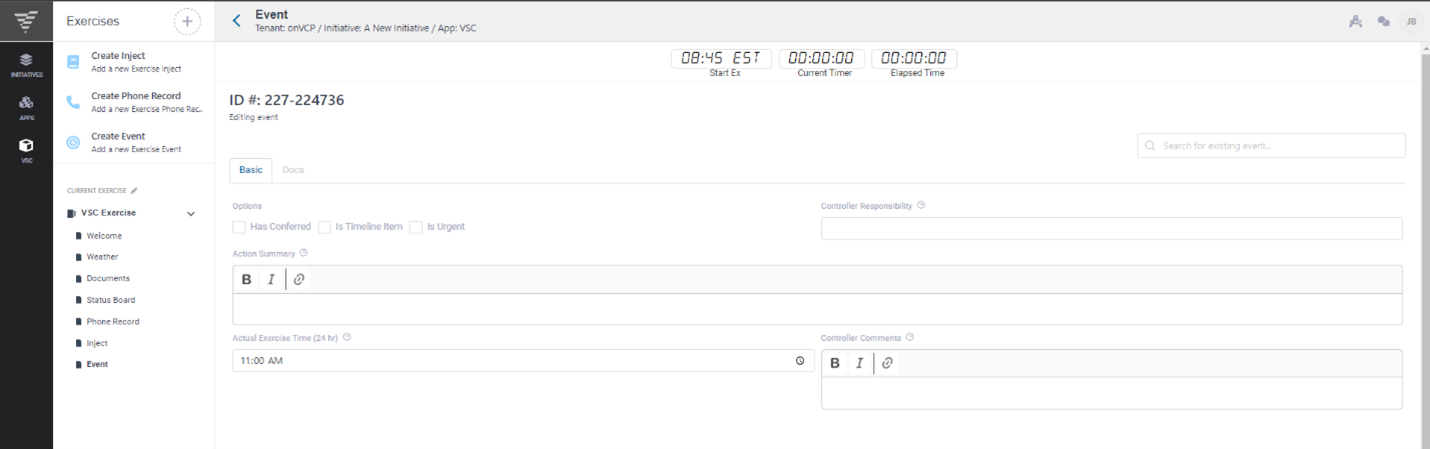
This form has two different tabs – Basic and Docs. Basic has fields that can be filled in and boxes that can be checked as needed for your Event (most of these fields pertain to the Event's Controller). Docs is linked to the Doc Center and any document that is desired to be attached to an Event can be done in this way.
Once the Event form is completed, 'Close' can be clicked at the bottom of the page to persist the changes. Conversely, the ‘Delete Event’ button can be selected to discard the form if no longer needed. Events will be compiled and accessible in the Status Board, along with Inject forms and Phone Records.
Creating Injects
Injects are another type of exercise form that can be created. Inject forms detail scenarios where a person makes a call to report something (i.e., hearing sirens). To get started, click the ‘Create Inject’ button at the top left of the page.
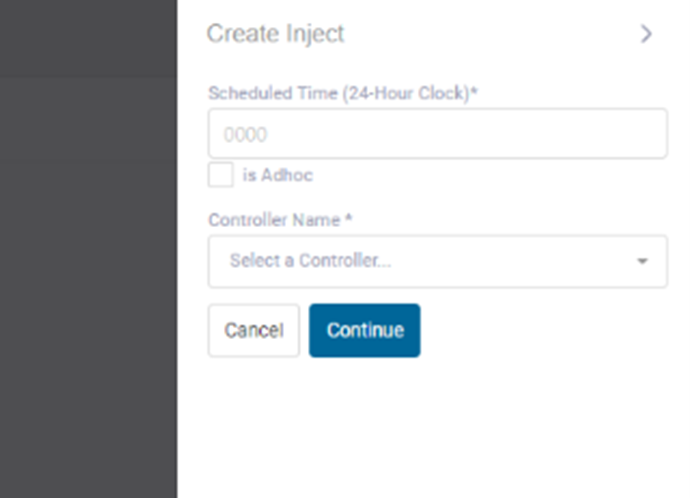
A sidebar will pop out of the right side of the screen asking for the following information:
• The scheduled event time • If the Inject exercise is Ad Hoc or not (made "on the fly" and wasn't preplanned) • The Controller's name (via a drop-down)
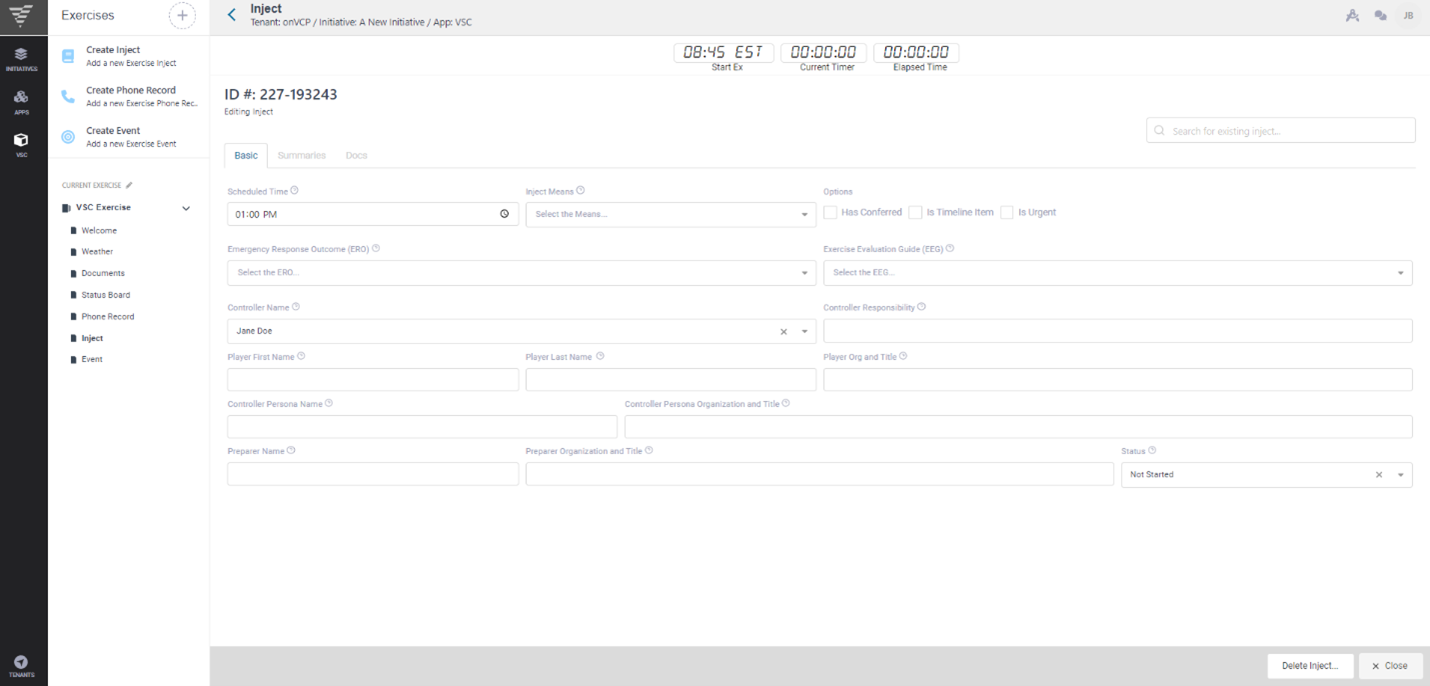
Once this information is submitted, a full Inject form will appear. Here, additional information can be input, such as:
• The Event's priority
• The Controller's name and responsibility
• The information about the Player
• The information from the Preparer of the form
• Whether the Event has transpired or not
Click 'X Close' at the bottom of the document to exit the page (changes will be saved). Clicking 'Delete Inject' will trash the current form if it is not needed.
When the page is confirmed, the Inject form will be available through the Status Board.

Creating Phone Records
Virtual SimCell has another type of form – Phone Records. These forms embody scenarios where a person is receiving a call (the Controller) and will be playing someone of authority (a "Persona" - i.e., a government official, a police officer, first responders, etc.). This type of form can be created by clicking on the ‘Create Phone Record’ button on the left side of the screen.
Like the other forms, a panel on the right side of the screen asking for the hours and the Controller's name will appear. Once those items are entered, click ‘Continue’ to be brought to the entire form.
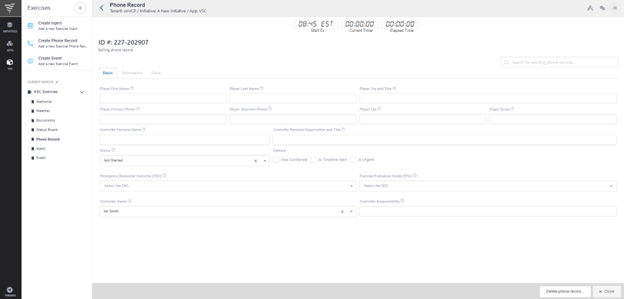
There are several tabs within this form – Basic, Summaries, and Docs. Each of these tabs accepts different information:
PHONE RECORD INFORMATION
• The Basic tab within the form contains various fields that can have information entered in, selected from a drop-down, or checked off. These fields contain information regarding the Player in the exercise, as well as the Controller.
• The Summaries tab is a portion of the document that chronicles the Controller's thoughts and objectives. This tab has a field for the Controller's notes, as well as for the summary of the action and the Actual Exercise Time.
• The Docs tab allows access to the Doc Center to link a document with a specific Phone Record.
These forms are compiled along with the Events and Injects in the Status Board.
The Doc Center
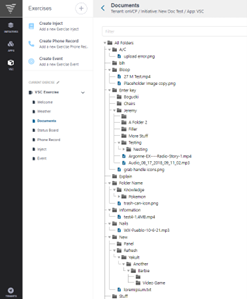
The Virtual SimCell also has access to the Doc Center and can implement documents uploaded there. These Documents can be accessed and are usable by clicking on the documents link on the left side of the page.
NOTE: While the public may have access, The Doc Center is only writable by the Controllers of the exercise.
A root (main) folder will show that can be expanded to reveal all the folders and documents from the Doc Center that are accessible to the Virtual SimCell.
WARNING
To utilize these files, you must include them in the 'VSC' folder within the Doc Center proper, otherwise they will show solely in the Doc Center and NOT in the Virtual SimCell.
For more information on the Doc Center, consult the section here.
Editing the Exercise
Clicking on the pencil icon next to an Exercise’s name will commence editing. This will open an array of customization that is accessible to the current exercise.
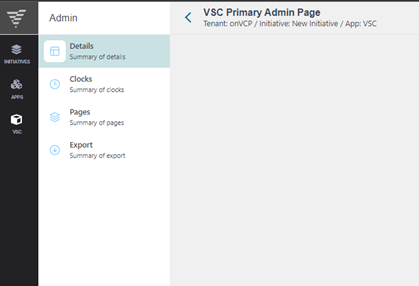
With given Permissions, the left side panel will show four different areas of customization:
• Details – This section will offer a summary of the exercise. There are two tabs in this section - Basic and Lists.
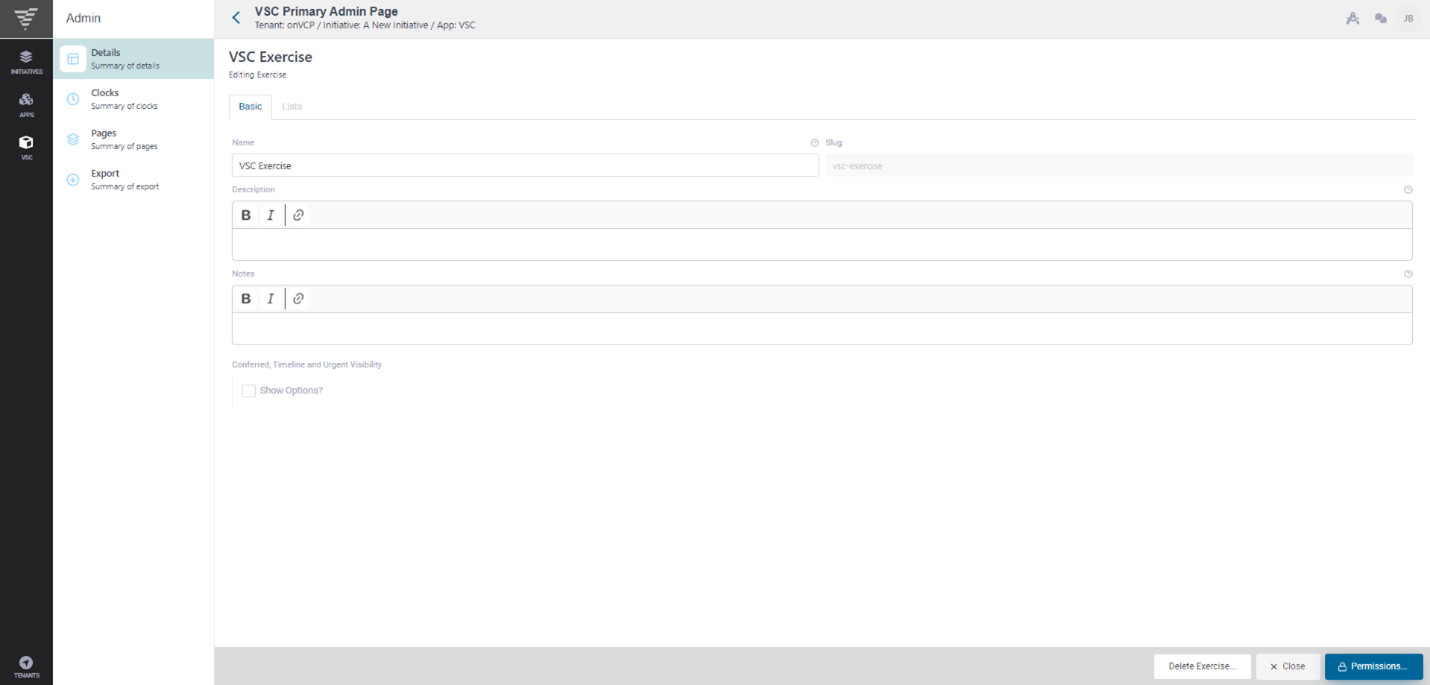
Under the Basic tab is where you can rename the exercise, provide a description of what the exercise is about, as well as leave relevant notes regarding the current exercise.
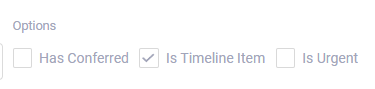
Finally, there are a series of radio buttons under the 'Options' section that have various characteristics that can be toggled:
• Has Conferred
• Is Timeline Item
• Is Urgent
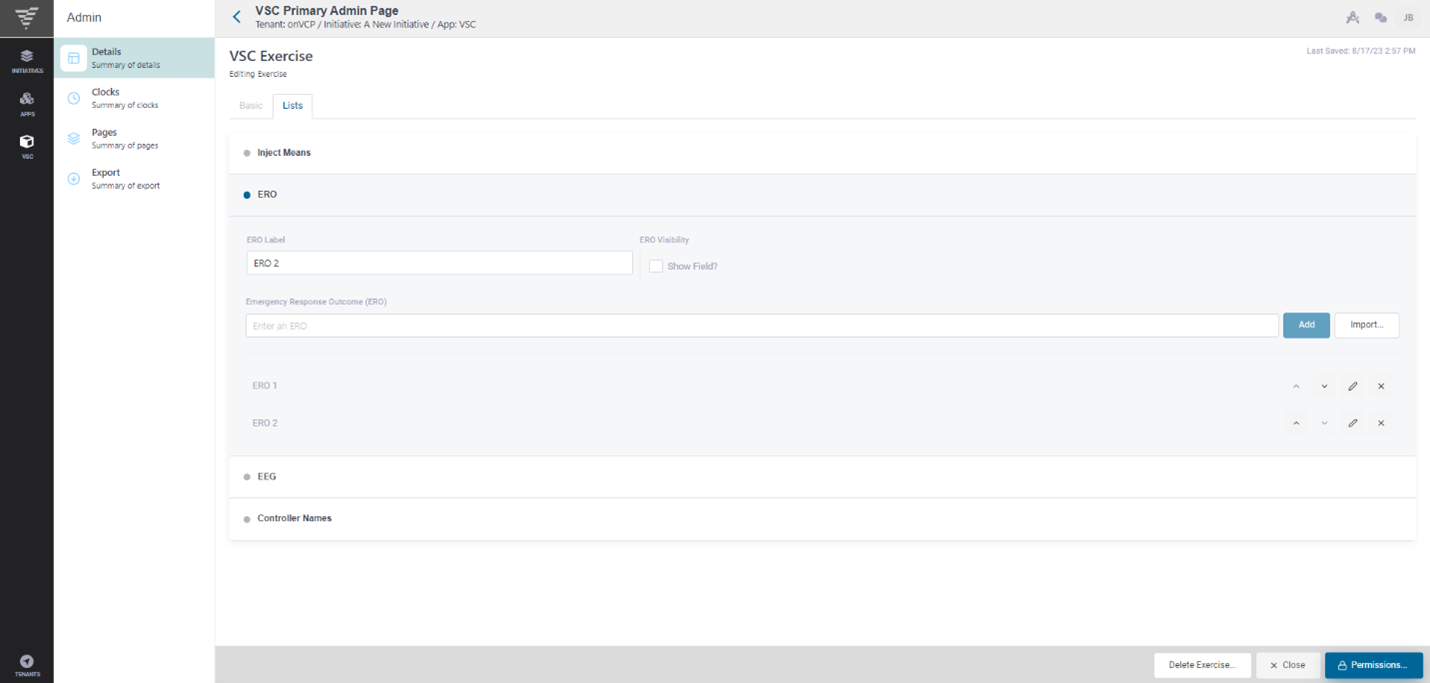
Under the Lists tab, there are several entries in the accordion clickable. Each entry will open and allow for data to be entered in a field and saved. Each entry deals with a different portion of the Virtual SimCell.
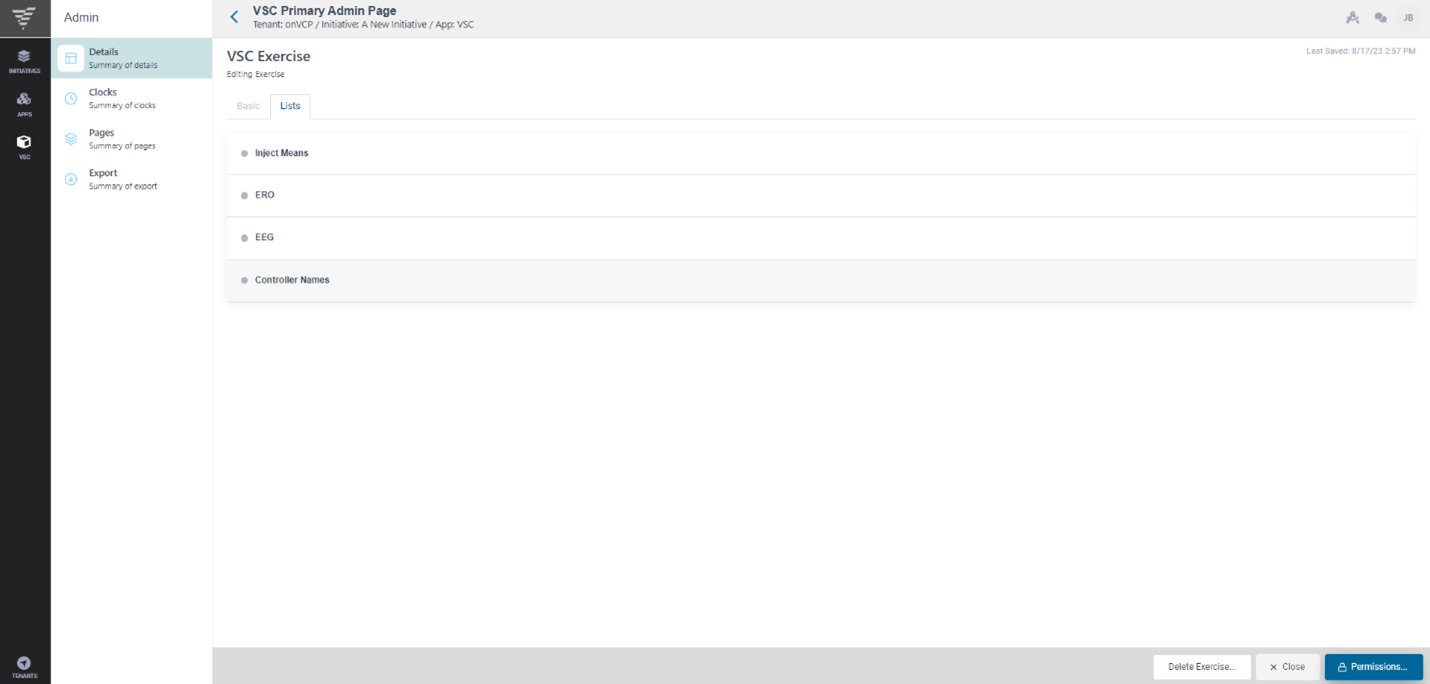
These are mostly identical with a few fields denoting different divisions (ERO, EEG, NIM, etc.). Across each of these entries, there are upward and downward arrows that allow you to move the items into your desired order. There is a pencil icon that can be used to edit the created entry and finally an X to delete the entry.
At the very bottom right of both tabs, there are four buttons. From left to right, here are the actions they perform:
![]()
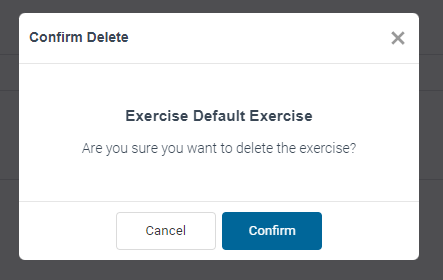
The 'Delete Exercise' button will erase the exercise if it no longer serves a purpose. Upon clicking, a pop-up will appear asking to confirm deletion. Press the blue 'Confirm' button if this is the intended result, otherwise selecting 'Cancel' will return you back to the exercise.
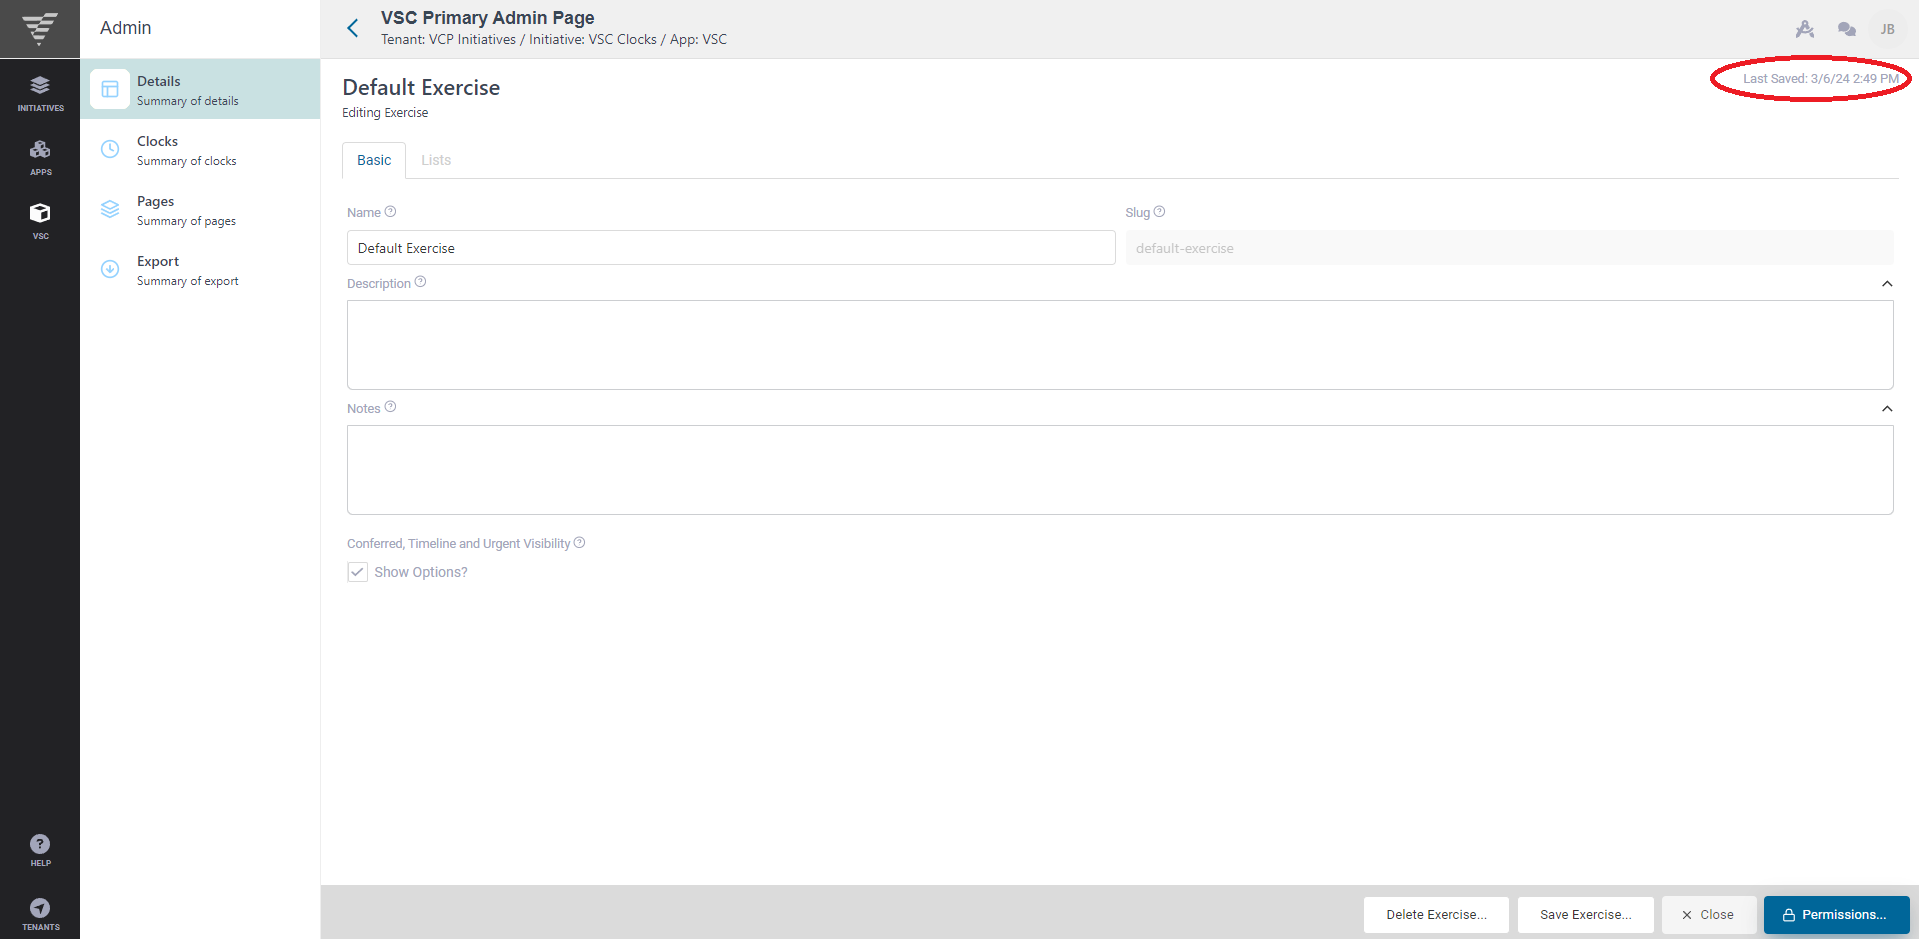
The 'Save Exercise' button will retain the current status and information you have entered. You will know your information is saved via a check mark appearing with the words 'Exercise Saved' in the top right hand corner of the page. This text will later change to reflect the last date and time the page was saved.
Next to that is the ‘X Close’ button that can be used to back out of this current screen. Your changes will not be saved when pressing this button.
The Permissions button is the final button. If you have the appropriate Permissions, this button will be visible to you. When this blue button is pressed, it will pop a side panel out from the right side of the screen. Here you can select a group to give Permissions to from the drop-down menu. To confirm your selection, press the check mark. To add a new group to the drop-down list, press the plus button. This will open a new side panel over the previous one to accept information like the group's name and description. There is also a box to check to allow group chatting. When finished, Click the blue 'Submit' button to persist your changes.
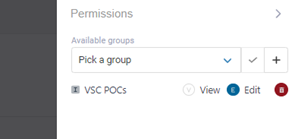
When you have a group selected, the options ‘View’ and ‘Edit’ will be present along with buttons with the corresponding first letter. Select the button with the corresponding letter on it to give that level of Permission to that group. If you decide against giving a group Permission, use the red trash can icon to the far right to discard your changes.
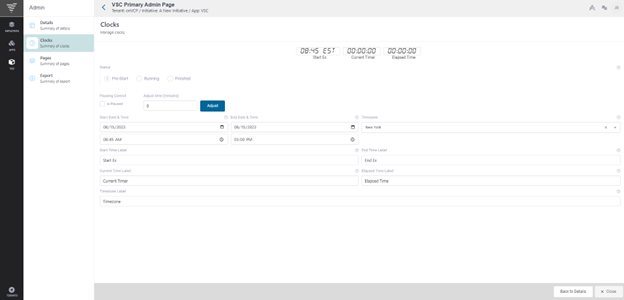
• Clocks – This is where the clocks can be managed for use during an exercise.
The radio buttons in this table can be used to determine if the clocks are in 'Pre-Start' mode, if they are 'Running', or if they are finished ('Elapsed Time').
When the 'Pre-Start' mode is selected, the clocks will show the Exercise Start time as well as having zeroed out boxes above the 'Current Timer', and the 'Elapsed Time'. These clocks change when put into the other two modes.

When the clocks are put into 'Running' they show the exercise start time, but the second and third clocks are then ticking, showing the timer running in the 'Current Timer' section and the total time elapsed in the final section.
If you move to the Status Board, you will see that the Clocks are still running. Your exercise can be managed in this way.
When the 'Finished' radio button is toggled, the clocks will stop. The first clock will still list the exercise start time; however, the second clock will now have changed to show the exercise end time. Finally, the last clock will reflect the 'Elapsed Time' for the exercise.

If the exercise takes place within a single day, the Single Day checkbox can be marked. This will output just the time of the event and not denote a day, unlike regular use cases where they will show the exercise across multiple days.
In the Time/Date section, you can select a 'Start Time and Date', as well as an 'End Time and Date' and a 'Time Zone'. If Single Day is selected, the form will just ask for the time and not the date.
Below is a button to signify if the clocks are paused and for how long in minutes. Upon inputting a time, press the ‘Adjust’ button to confirm the amount and shift the clocks that amount of time.
Finally at the bottom are the fields for the location of the event as well as 'Start', 'Current', 'Elapsed', 'End Times' and 'Time Zone'.
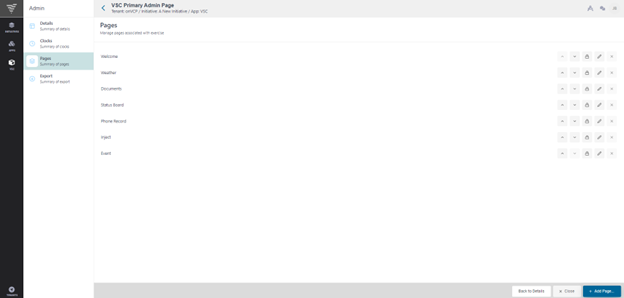
• Pages – This section offers a summary of the Pages used within the Initiative. Here you can arrange the Pages to fit your preferences by using the up and down arrows, you also can give different groups various Permissions to specified pages. If given access, you can edit them by using the pencil icon or delete them by clicking the X.
Additional Pages can be added using the ‘+ Add Page’ button in the bottom right corner. To negate this page, press the ‘X Close’ button to go back to the Status Board or press ‘Back to Details’ to go back to the corresponding page.
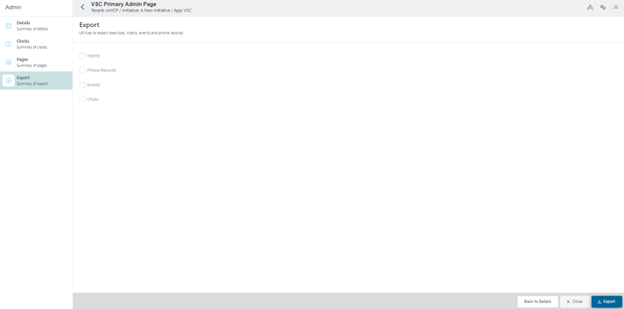
• Export – This section allows you to transfer the data for the various forms - Injects, Events, Phone Records, and Chats outside of the app if permitted to do so. With the indicated data selected, press the Export button at the bottom right-hand corner to save the data. To negate this page, press the ‘X Close’ button and you will be taken back to the Status Board or press ‘Back to Details’ to go back to the 'Details' page.